EN
Garden Branch Chipper Maintenance Guide for Long Term Operation.
A garden branch chipper earns its place when pruning piles turn into manageable mulch rather than a weekend-long hauling job. Yet a machine that feeds unevenly, leaves ragged chips, or labours through material is usually asking for attention, not more force. This guide gives owners and service teams a practical routine for equipment maintenance, blade replacement, storage, and repair decisions that can support a longer service life.
As a garden-machinery technical consultant, I start with the same observation: a garden branch chipper lasts longer when its operator notices small changes early. The owner’s manual remains the authority for lubrication points, torque values, service intervals, and safe access. Use this article as a working framework alongside that model-specific information.
Start Every Garden Branch Chipper Job With a Safe Check
Before starting a garden branch chipper, place it on firm, level ground and clear the work area of loose tools, children, pets, and bystanders. Wear eye and hearing protection, close-fitting workwear, sturdy footwear, and gloves suitable for handling branches. Keep hands out of feed openings; use the manufacturer-supplied paddle or a suitable branch to guide material when the manual permits it.
With the power source isolated and moving parts stopped, look over the garden branch chipper for loose guards, cracked housings, frayed cables, fuel or oil seepage, and fasteners that appear to have worked loose. Check that the discharge route is clear and that collection bags, covers, and interlocks are fitted as intended. If a guard or interlock is damaged, stop and arrange repair before operation.
It is tempting to treat a quick visual check as optional after a light pruning session. In practice, this is the shortest form of equipment maintenance: it catches damage while the cause is still easier to identify.
Clean the Machine After Use, Not at the Next Service
A clean garden branch chipper is easier to inspect. After isolating the power and allowing hot areas to cool, brush loose chips, dust, sap residue, and damp leaf matter from the feed chute, discharge area, screen area if fitted, and exterior vents. Do not direct high-pressure water into bearings, electrical components, switches, or the engine area. A dry brush and cloth are often enough for routine cleaning.
Moist debris left inside a garden branch chipper can hold moisture against metal surfaces and hide developing wear. It can also harden into a blockage before the next use. If the machine plugs, isolate energy, follow the manual’s clearing procedure, and inspect the material being fed. Wet, stringy, soil-covered, or oversized branches can overload a system even when the machine appears mechanically sound.
For petrol-powered models, remove leaves and chips from cooling fins and the muffler area after the unit has cooled. For electric models, inspect the cable, plug, strain relief, and ventilation openings. Record anything unusual in a simple service note; a recurring rattle or clog is useful evidence when repair is needed.
Know When Blade Replacement Is Due
Cutting parts affect both chip quality and load on a garden branch chipper. Typical signs of dull or damaged blades include more pulling than cutting, stringy output, branches bouncing at the inlet, reduced throughput, vibration, or a change in sound. These signs do not automatically mean the blades are the only fault, but they justify an inspection.
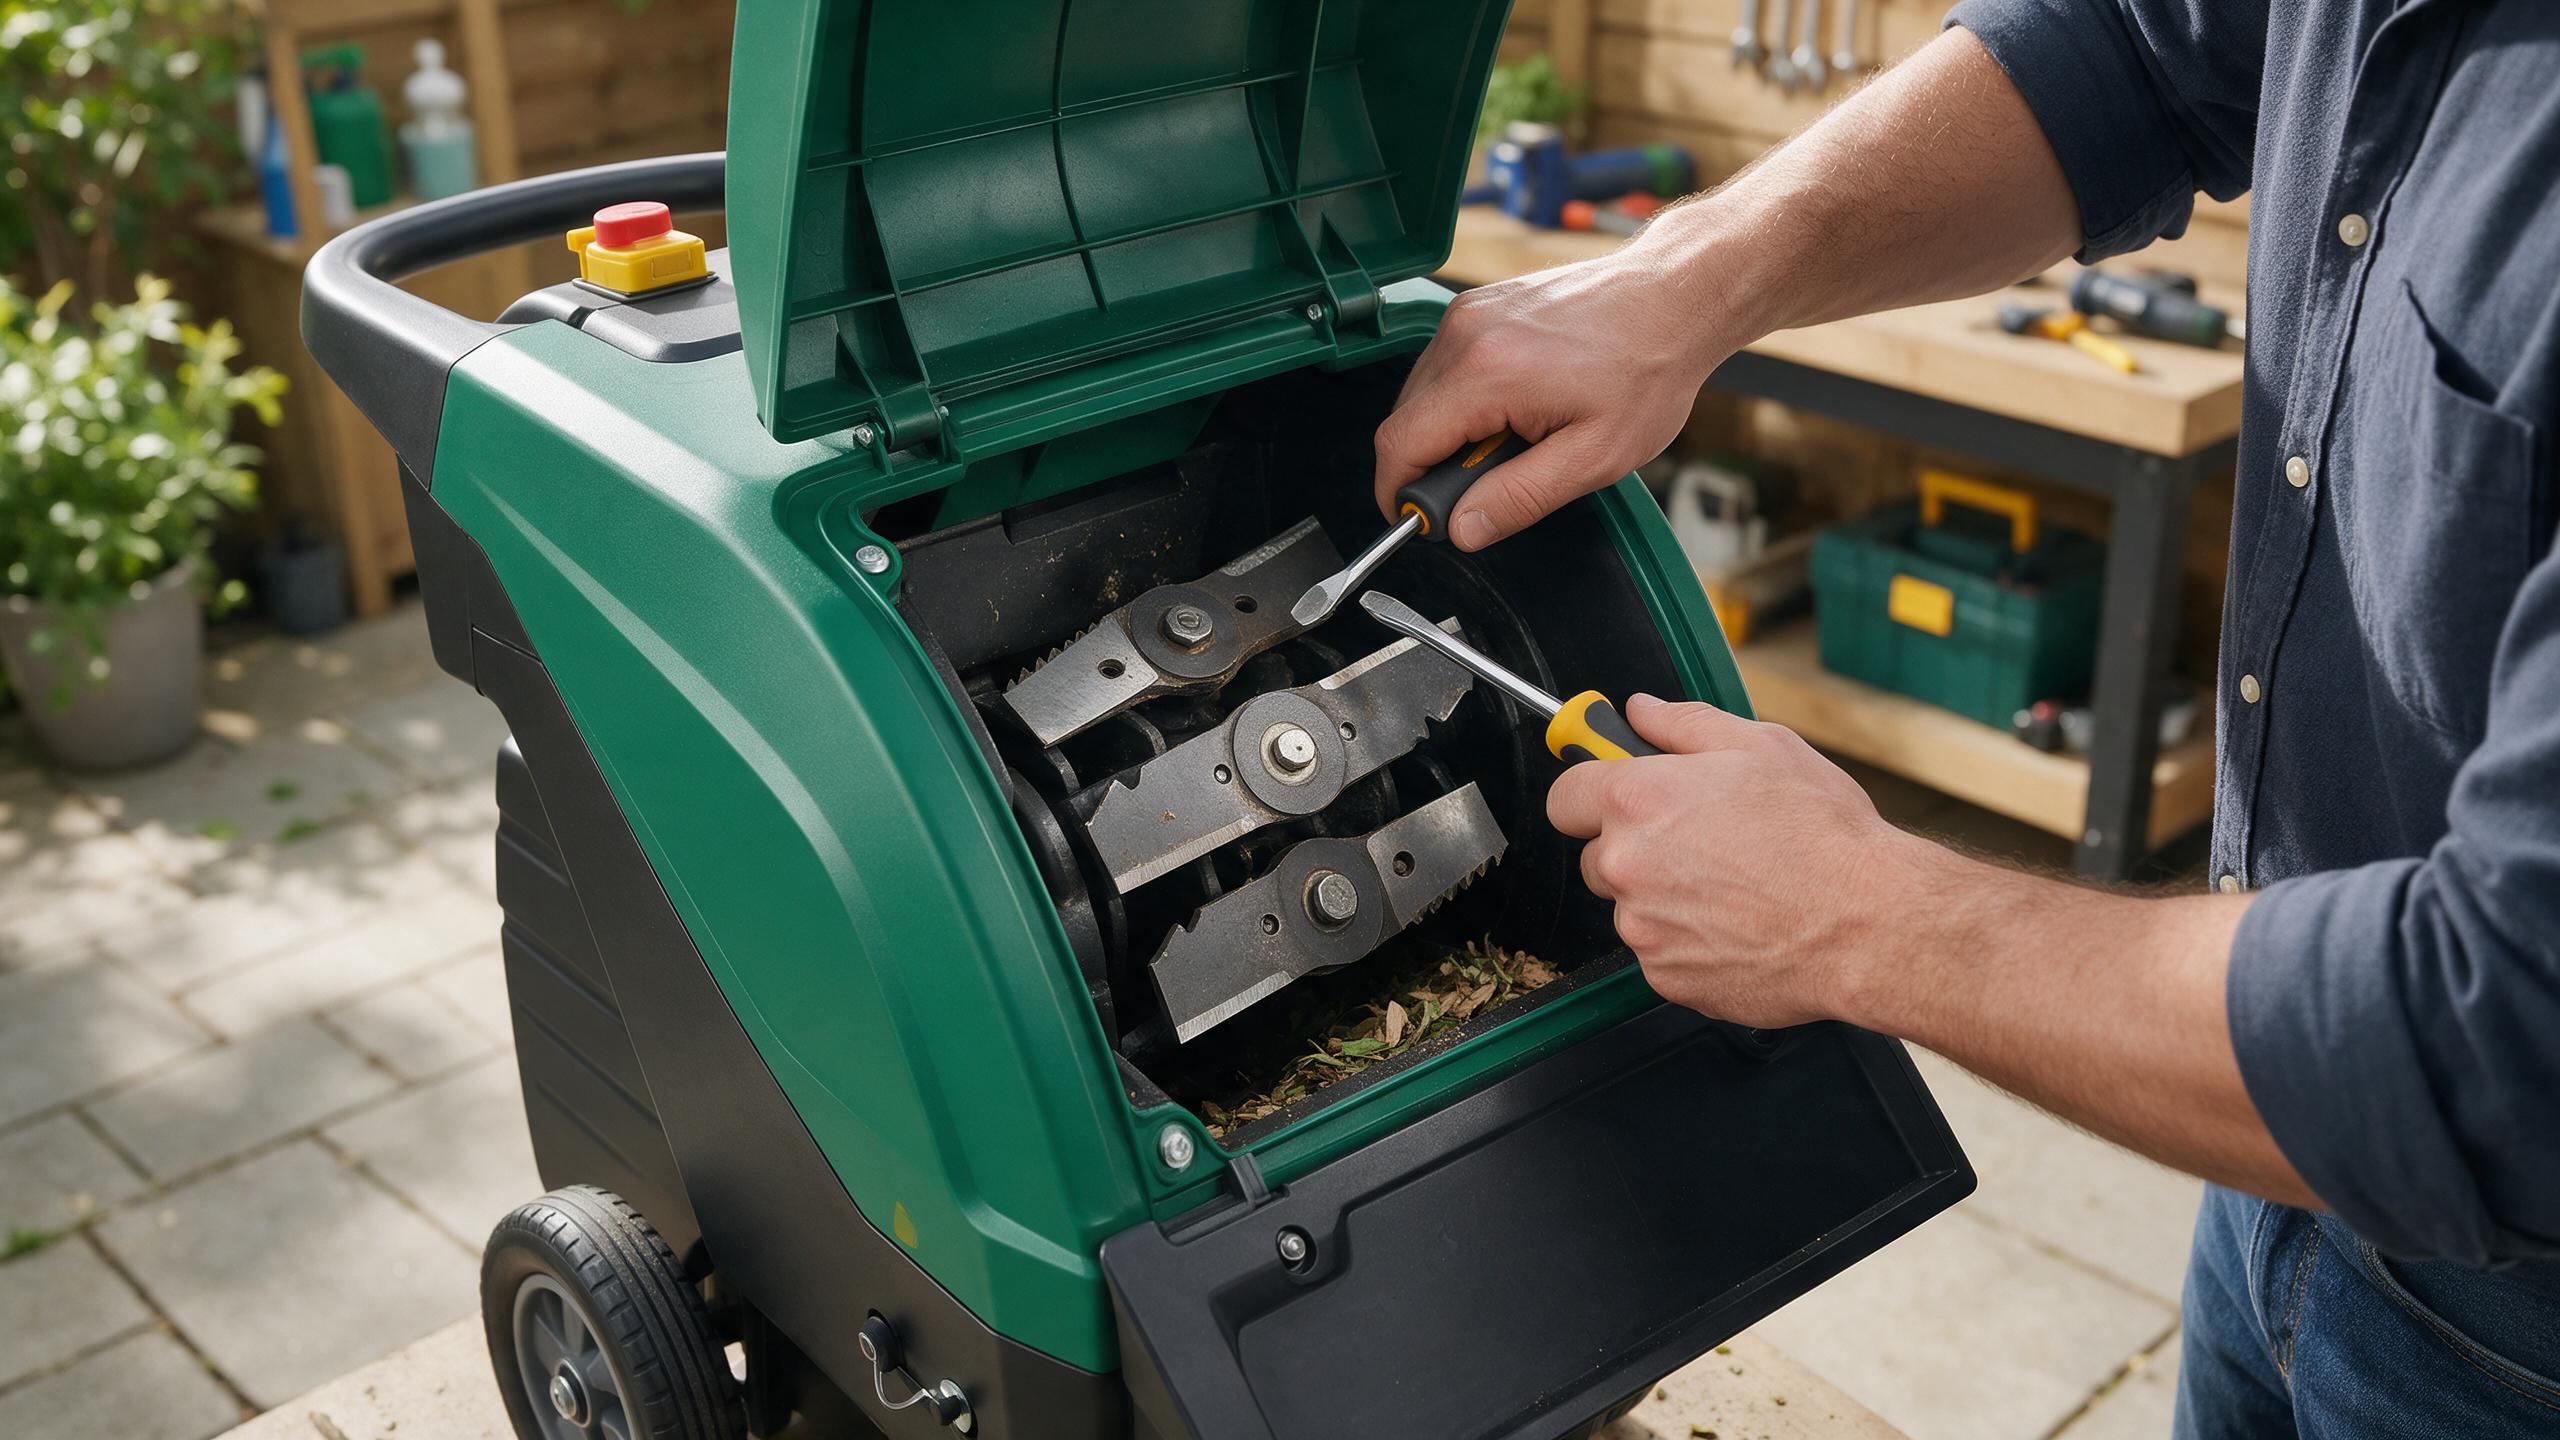
Blade replacement should be performed only with the garden branch chipper disconnected from its power source and secured against starting. Follow the manufacturer’s instructions for access, blade orientation, replacement hardware, tightening sequence, and torque. Some designs permit a blade to be turned or sharpened; others call for replacement. Do not assume parts are interchangeable merely because they look similar.
Clean the mounting surface before fitting approved replacement parts. If you find a chipped knife, distorted rotor, damaged bolt, or elongated mounting hole, pause the job and seek qualified repair support. Replacing one visible part while ignoring related damage may shorten the service life of the garden branch chipper.
Build a Maintenance Rhythm Around Actual Use
The right interval depends on machine design, branch type, hours of use, and storage conditions. Rather than applying a generic schedule, divide garden branch chipper care into four moments: before use, after use, periodic service, and seasonal storage.
- Before use: inspect guards, fasteners, feed and discharge paths, cutting components, cables or fuel lines, and fluid levels where applicable.
- After use: remove debris, check for unusual vibration or noise, and note any decline in feed performance.
- Periodic service: follow the manual for lubrication, air-filter care, drive-belt inspection, engine service, and fastener checks.
- Seasonal storage: clean and dry the garden branch chipper, address corrosion at approved points, and prepare fuel or batteries exactly as the manual directs.
This routine makes equipment maintenance less dependent on memory. A label on the storage shelf or a shared log can show the last inspection, blade replacement, and repair work. That small record is especially valuable where several people use the same garden branch chipper.
Feed Material in a Way That Reduces Wear
Maintenance begins with operation. Feed branches within the stated diameter limit and avoid adding stones, wire, soil, metal tags, or roots. Trim heavily forked pieces into manageable lengths when the manual recommends it. Feed one branch at a time at a controlled pace, allowing the garden branch chipper to process the previous material before adding more.
Overfeeding can trigger jams, strain belts or drives, and make a normal blade seem inadequate. Conversely, very dry hardwood may wear cutting edges faster than softer, fresh pruning. The useful question is not whether a garden branch chipper can pull material in once; it is whether it does so smoothly without vibration, smoke, repeated overload trips, or abnormal noise.
Diagnose Common Problems Before Ordering Parts
The Garden Branch Chipper Will Not Start
First confirm the power supply, emergency stop position, guards, collection container, and safety interlocks. On an engine model, consult the manual for fuel, oil, choke, ignition, and spark-plug checks. On an electric unit, inspect the cable and outlet arrangement. Do not bypass an interlock to test the garden branch chipper; arrange repair if the safety system does not behave as specified.
It Feeds Slowly or Produces Rough Chips
Check the branch diameter, moisture condition, debris buildup, cutting parts, and drive components described in the manual. A careful blade inspection may point to blade replacement, while a clean and correct feed technique may resolve the issue without parts. If the rotor does not turn freely with power isolated, stop and have the garden branch chipper assessed.
It Vibrates, Smells Hot, or Makes New Noises
These are stop-and-check signals. Loose cutting hardware, an imbalanced rotor, a worn bearing, damaged belt, blocked cooling path, or foreign object can all require repair. Continuing operation can turn a limited fault into a larger service event. Document the symptom and stop using the garden branch chipper until the cause is understood.
Store for the Next Season
Long storage should begin with a dry, clean garden branch chipper. Keep it under cover in a ventilated location clear of corrosive moisture. Follow the manufacturer’s instructions for fuel stabilisation or fuel removal, battery storage, and any approved corrosion protection. Avoid placing a tarp directly against a damp machine, because trapped condensation can cause trouble over time.
Before the next season, repeat the pre-use inspection rather than assuming last year’s equipment maintenance is still current. Check the cutting chamber for nesting material or corrosion, examine cables and tyres where fitted, and test controls according to the manual.
Repair or Replace: Make the Decision With Service Life in Mind
A garden branch chipper with normal blade wear, a belt adjustment, or a replaceable switch may be a sensible repair candidate when parts and service are available. More caution is appropriate if there is structural cracking, recurring rotor damage, inaccessible safety faults, or repair costs that approach the value of a suitable replacement.
Ask a service provider for a clear description of the fault, the parts involved, and whether related wear should be addressed at the same visit. For dealers and fleet operators, spare-parts availability and clear maintenance documentation are part of total ownership, not an afterthought. A well-supported garden branch chipper is easier to keep in productive condition across many pruning seasons.
Final Maintenance Checklist
Use the garden branch chipper within its stated capacity, clean it after every session, inspect cutting parts before performance declines, and follow the manual for blade replacement and periodic service. Stop for vibration, overheating, damaged guards, or unfamiliar noises. Consistent equipment maintenance does not remove the need for qualified repair, but it gives you a stronger basis for deciding when repair is appropriate and how to protect the machine’s service life.
 Hot News